Applying Effect Filters
Applying Effect Filters
You can use the Render, Stylize, and Offset filters to transform images. The Render filters apply forms or textures to an image. The Stylize filters apply a conceptual effect to an image. Stylize filters include Emboss, Trace Contour, and Solarize. The Offset filter shifts the pixels within an image.
Rendering Clouds
You can apply texture to areas in an image, such as skies or walls, by applying the Clouds filter. The Clouds filter renders soft swirls of color using the foreground and background colors.
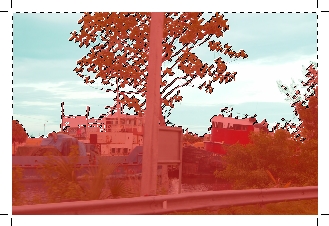
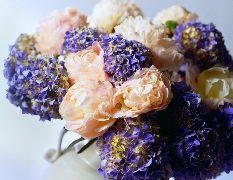
| Image with translucent clouds |
The Clouds filter completely replaces the original image or selection.
To Apply the Clouds Filter to an Image:
- Select one or more paint objects to adjust all the images. You can select an area in one image in Edit mode to adjust the selected area only. If you don’t make a selection, the entire image in Edit mode is affected.
- Choose Image | Filter | Render | Clouds or use the Filter menu located in the Properties bar.
This filter doesn’t work with paint objects in Black & White mode, and Indexed mode.
To Apply the Clouds Filter to Selections:
- With a paint object in Edit mode, choose Image | Show Channels to open the Channels palette.
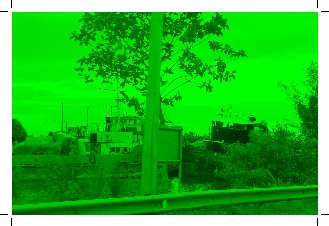
- Select a color channel that shows the most contrast.
- Drag the selected channel to the new channel button to create a copy of the channel. The channel copy is in black and white.
- Select the channel copy in the Channels palette and double-click to open the Channel Options dialog box.
- Enter a name for the channel copy in the dialog box.
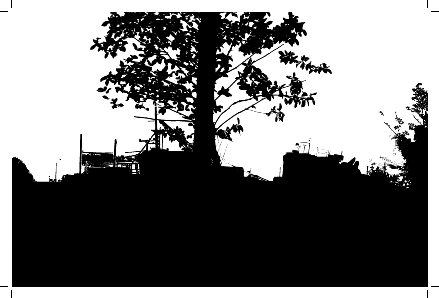
- With the painting tools, apply white to the areas where clouds are to appear. Apply black to the area where clouds won’t appear.
- Select the composite channel to make it active.
- Choose Image | Select | Load. Select the channel copy that you edited. The white area appears as a selection.
- Select your background and foreground colors in the Inks palette. The colors you select determine the cloud color.
- Choose Image | Filter | Render | Clouds to affect the selected area.
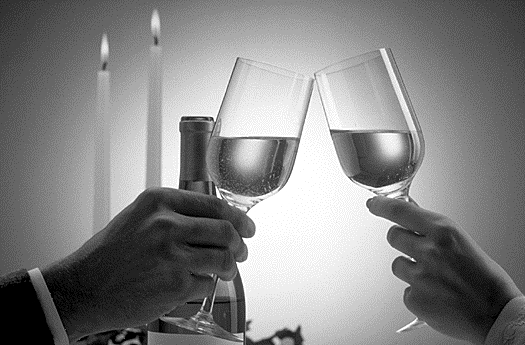
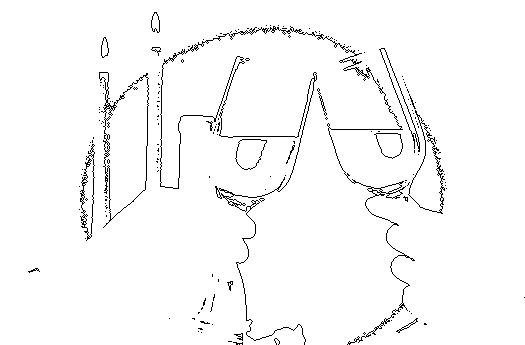
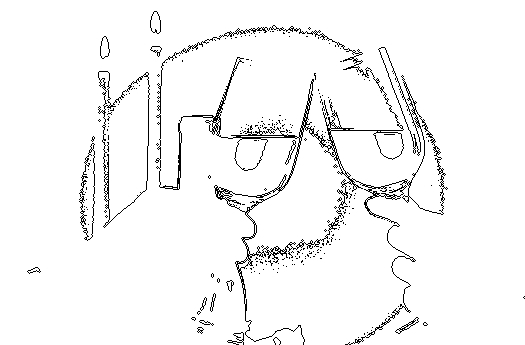
| Original image |
| Color channel selected |
| Painted channel copy |
| Composite channel with |
| Final image |

Rendering a Color Wheel
Fill a selection with a radial blend of colors by choosing Image | Filter | Render | Wheel. The rendered effect looks like the color wheel preview in the Hue/Saturation dialog box. The Wheel filter works with paint objects in RGB Color and CMYK Color.
Unless you make a selection in the image, the Wheel filter replaces the entire image.
If you want to apply a translucent wheel effect, follow the steps for the procedure for To Apply the Clouds Filter to Selections detailed above, but in the last step, choose the Wheel command.
Embossing an Image
Make an image appear raised with the Emboss filter. This filter converts low-contrast areas to gray and accentuates high-contrast areas with color (or black and white if the image is Grayscale mode) according to the placement of a theoretical light source.
The Emboss filter doesn’t work with paint objects in Black & White mode, and Indexed mode.
| Original (converted to grayscale) |
| Embossed Angle = 15 Height = 3, Amount = 110 |

To Apply the Emboss Filter:
- Select one or more paint objects to emboss. To apply the emboss filter to a limited area in one image, select the area.
- Choose Image | Filter | Stylize | Emboss or use the Filter menu in the Properties bar.
- Enter an Angle from 0 to 360. An angle of 0 is straight right with higher numbers going counter-clockwise.
- Enter a Height from 1 to 32 pixels to set the height of the effect.
- Enter a Number from 1 to 500 in the Amount text box, or use the slider. To retain more color along high-contrast borders, increase this value.
Solarizing Images
Create surrealistic effects in an image by applying the Solarize filter. The Solarize filter mimics a photographic darkroom procedure that exposes film to light during development.
Solarize CMYK Color, RGB Color, and Grayscale mode images. If you make a selection, Canvas X Draw filters only selected pixels.
To Solarize an Image:
- Select one or more paint objects to solarize. To apply the Solarize filter to a limited area in one image, select the area.
- Choose Image | Filter | Stylize | Solarize or use the Filter menu in the Properties bar.
| Original |
| Solarized |
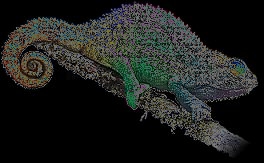
Outlining Areas Based on Color Value
With the Trace Contour filter, you can outline image areas that border a particular color. This filter makes color outlines if you are working with a color image, and black outlines if you are working with a Grayscale mode image.
This command doesn’t work with paint objects in Black & White mode, and Indexed mode.
To Use the Trace Contour Filter:
- Select one or more paint objects to adjust all the images. You can select an area in one image in Edit mode to adjust the selected area only. If you don’t make a selection, the entire image in Edit mode is affected.
- Choose Image | Filter | Stylize | Trace Contour or use the Filter menu in the Properties bar.
- Enter a Level value from 0 to 255. The Trace Contour filter uses this color brightness value to determine the areas to trace.
- Select Upper or Lower in the Edge area. To outline areas with higher brightness levels than the one specified, choose Upper. Choose Lower to outline areas with lower brightness levels.
- To see the effect of the settings, turn on Preview. When the settings are correct, click OK.
| Original |
| Level =169 |
| Level =169 |
Offsetting Selections
You can shift an image area with the Offset filter. Canvas X Draw fills the vacated area with color, duplicated pixels, or parts of the offset area.
| Original |
| Set to Background |
| Repeat Edge Pixels |
| Wrap Around |
To Offset Image Areas:
- With an image in Edit mode, select an image area.
- Choose Image | Filter | Other | Offset or use the Filter menu in the Properties bar.
- Enter horizontal and vertical offset amounts in pixels. Positive values result in offsets to the right and down; use negative numbers (preceded by a minus sign) to offset up and left.
- Choose an option under Undefined Areas.
- Set to Background: Fills area with the background color.
- Repeat Edge Pixels: Duplicates edge pixels until they fill the area vacated by the offset.
- Wrap Around: Moves pixels cut off by the offset into the vacated area.
- Turn on Preview to see the effect of the settings.
- Click OK when the settings are correct.
Related Articles
Applying Effect Filters
Applying Effect Filters You can use the Render, Stylize, and Offset filters to transform images. The Render filters apply forms or textures to an image. The Stylize filters apply a conceptual effect to an image. Stylize filters include Emboss, Trace ...Applying Effect Filters
Applying Effect Filters You can use the Render, Stylize, and Offset filters to transform images. The Render filters apply forms or textures to an image. The Stylize filters apply a conceptual effect to an image. Stylize filters include Emboss, Trace ...Applying Effect Filters
Applying Effect Filters You can use the Render, Stylize, and Offset filters to transform images. The Render filters apply forms or textures to an image. The Stylize filters apply a conceptual effect to an image. Stylize filters include Emboss, Trace ...Blur Filters
Blur Filters Blur filters soften images by decreasing contrast between neighboring pixels. These commands work with all image modes except Indexed and Black & White. Apply the Blur filters by choosing Image | Filter | Blur or by using the Filters ...Blur Filters
Blur Filters Blur filters soften images by decreasing contrast between neighboring pixels. These commands work with all image modes except Indexed and Black & White. Apply the Blur filters by choosing Image | Filter | Blur or by using the Filters ...