Combining Objects
Combining Objects
The Combine command in Canvas X Draw allows you to create new objects from the intersection of two or more vector objects. You can outline the overlapping objects, delete all except the overlapping area, subtract the overlapping area, and perform other combinations. You can also use the Visual Combine tool to combine the common areas of overlapping vector objects.
Combine Effects
To access the Combine menu, select more than one vector object. To use a combine method, each selected object must overlap at least one other selected object.
To Combine Objects:
- Select two or more objects that you want to combine.
- Do one of the following:
Choose a combine method from the Combine drop-down menu in the Properties bar.
Choose a combine method from the Combine palette (Effects | Combine).
The effect is immediately applied.
Selecting a Combine Method
The Combine menu contains various methods for combining objects. Some methods require that the paths of overlapping objects intersect for the effect to be visible or work properly. In addition, some methods work only with closed vector objects, and not with lines and open curves.
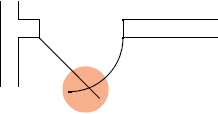
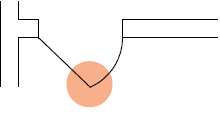
- Trim: Trims intersecting lines or arcs by shortening them until they meet at a vertex. You can trim a line to a line, an arc to an arc, or an arc to a line. In each case, Canvas X Draw trims the shorter segments of the intersecting lines and arcs. Trimmed lines and arcs remain separate and retain their attributes.
- Outline: Creates one path around the selected objects and fills the interior of the new shape with the ink of the front object.
- Add: Joins two objects where they overlap to create a compound path, and fills the new shape with the ink of the front object. Compound paths can include multiple closed shapes that have holes in them, unlike objects created with the Outline option.
- Intersect: Creates a new object from the intersection of all selected objects and fills the new object with the ink of the front object. All selected objects must be closed paths and share a common area.
- Punch: Removes the area where selected objects intersect and fills the new object with the ink of the front object. If you select more than two objects, Canvas X Draw starts with the back object and continues forward through the stacking order.
- Subtract Front: Removes from the back object the areas of overlapping objects in front. The back object retains its ink attributes.
- Subtract Back: Removes from the front object the areas of overlapping objects behind it. The front object retains its ink attributes.
- Crop: Removes areas of objects that are not behind the top object.
- Divide: Creates new objects where selected objects overlap. This option lets you use lines to “cut” other objects in pieces.
- Slice: Cuts the path of an object where it intersects with objects in front of it in the stacking order. The slice method results in two closed paths; e.g., slicing a circle in half with a line produces two closed semicircles.
- Mix: Creates new objects where selected objects overlap, similar to the Divide option. However, Canvas X Draw fills overlapping areas with a new color (the original colors must be solid). To determine the new color, Canvas X Draw compares the CMYK values of all the overlapping objects and uses the highest value of each color. (If you are using RGB colors, Canvas X Draw first converts the colors to CMYK.) For example:
- Transparency: Creates new objects where selected objects overlap, and fills overlapping areas with a new RGB color (the original colors must be solid). However, transparency lets you specify the level of transparency. When you select the Transparency option, enter a percentage in the text box that appears; 100% is completely transparent, and zero is opaque.
Trim also trims lines or arcs where they intersect closed vector objects. The vector objects do not change.
If Canvas X Draw can’t trim the selected objects, a message tells you that the operation requires at least one open path.
|
|
Original objects | Trim applied |
|
|
|
Original objects: | Objects combined | Outline shape smoothed |

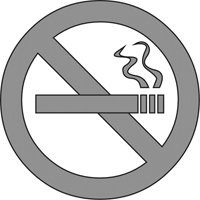
With the Add method, Canvas X Draw merges the cigarette to the prohibited symbol to create a no smoking sign.
|
|
Original objects | Combined with Add method |

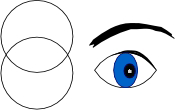
| The Intersect method helps you create some useful, basic shapes. Here, the intersection of two circles (highlighted) results in an eye shape. |
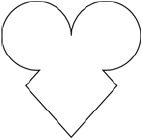
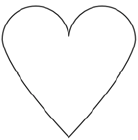
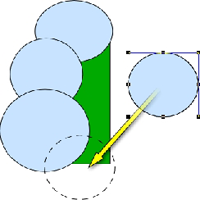
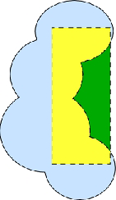
Create a quick illustration of a holly leaf by combining a group of circles with a rectangle and then applying the Subtract Front command to that selected group of objects.
|
|
|
Create and group objects | With objects selected, | Finished object |

|
|
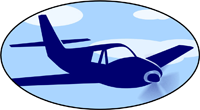
Oval used to crop a vector drawing of an airplane | A symbol-filled oval provides a background |

| Cyan | Magenta | Yellow | Black |
Color 1 | 50 | 30 | 25 | 5 |
Color 2 | 25 | 40 | 20 | 0 |
New Color | 50 | 40 | 25 | 5 |
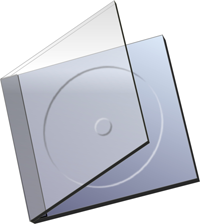
| Using the Transparency method, the artist created the illusion that you can see through the cover of the CD case. You can see the bottom of the case through the cover. |
If multiple overlapping objects are grouped, Canvas X Draw treats the group as a single object and doesn’t apply the transparency or mix effect within the group.
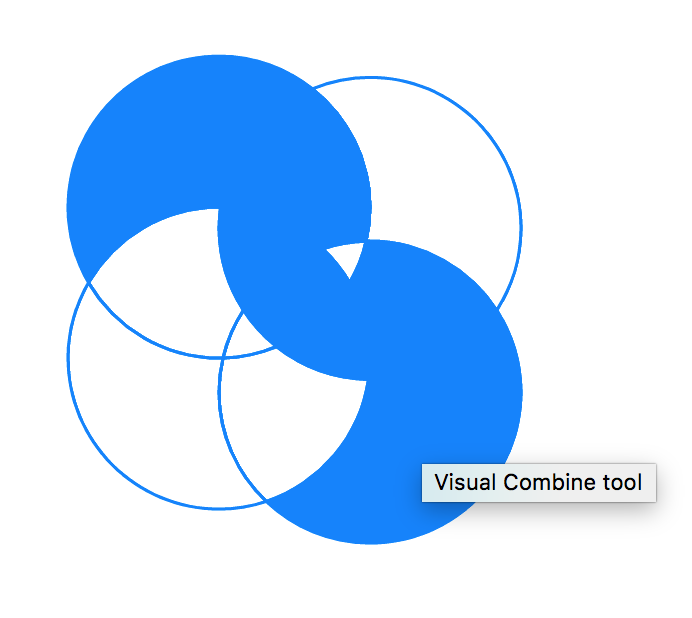
Combining Objects with the Visual Combine Tool
The Visual Combine tool allows you to combine the common areas of overlapping vector objects.
To Combine Objects Using the Visual Combine Tool:
- Do one of the following:
- Select two or more overlapping closed vector objects with the Selection tool.

- Select the Visual Combine tool from the Toolbox and drag across the common areas of the overlapping closed vector objects you would like to combine.

- In the Properties bar, set your desired highlight color. When you move the mouse pointer over an area in the selection, it will be highlighted in the specified color.
- Click on an area to start merging from and drag to the overlapping areas to combine. When you release the mouse button, the combined areas are highlighted. The combined area will take on the attributes of the area from which you began to drag. Repeat this step as needed.
To Subtract Areas from Your Selection:
You can subtract areas from the selection while using the Visual Combine tool. Hold down Control and click the area you want to subtract.
You can use the Undo icon in the Toolbar or press Command+Z to undo mistakes while merging.
To Exit Edit Mode While Using the Visual Combine Tool:
Do one of the following:
- Click the Visual Combine icon on the left side of the Properties bar.
- Press Esc.
- Select the Selection tool in the Toolbox.
Related Articles
Combining Objects
Combining Objects The Combine command in Canvas X Draw allows you to create new objects from the intersection of two or more vector objects. You can outline the overlapping objects, delete all except the overlapping area, subtract the overlapping ...Combining Objects
Combining Objects The Combine command in Canvas X Draw allows you to create new objects from the intersection of two or more vector objects. You can outline the overlapping objects, delete all except the overlapping area, subtract the overlapping ...Arranging Objects in the Stacking Order
Arranging Objects in the Stacking Order Each object in a Canvas X Draw document is part of a stack of objects on the same layer. Each object has a position in the stack. Unless you rearrange objects, the newest object, created or pasted, is in front ...Arranging Objects in the Stacking Order
Arranging Objects in the Stacking Order Each object in a Canvas X Draw document is part of a stack of objects on the same layer. Each object has a position in the stack. Unless you rearrange objects, the newest object, created or pasted, is in front ...Arranging Objects in the Stacking Order
Arranging Objects in the Stacking Order Each object in a Canvas X Draw document is part of a stack of objects on the same layer. Each object has a position in the stack. Unless you rearrange objects, the newest object, created or pasted, is in front ...